Introduction
Ever since I got into 3D printing, I always wanted to tackle a project that felt bigger than just another print off the build plate. I wanted something that looked like it came straight out of a movie workshop. That project ended up being a full T-800 Terminator inspired by the classic Terminator films. What started as “this would be cool to print” quickly turned into a crash course in electronics, painting, servos, wiring, troubleshooting, and learning how to fix problems I definitely did not know how to solve when I started.
While I had been 3D printing for a while before this project, I knew virtually nothing about Arduinos or servos going into it. That part of the build pushed me way outside my comfort zone, but honestly, that ended up being one of the most rewarding parts of the whole process.
The Beginning
The project started when I found an incredibly detailed T-800 model created by another artist online. Once I had the files, the first challenge was getting everything prepared inside slicing software for printing. That meant figuring out print orientation, supports, infill settings, and splitting larger pieces into printable sections.
At this point I already had a decent amount of experience with 3D printing, but large multipart projects are a completely different beast. Every setting matters because one bad print can mean wasting a huge amount of filament and a ton of time. Some of these pieces took ages to print, so there was always that nervous feeling of hoping you didn’t wake up to spaghetti filament all over the printer.
Trading for a Printer and Fighting the Extruder
Around the time I started the project, I had recently moved across the country and left my Ender 3 Max behind. Suddenly I went from having a printer I trusted to not having one at all. Eventually I ended up trading an old VR system for an Ender 3 Pro, which honestly sounded like a great deal at first… until I realized the printer had some issues.
One of the biggest problems was the extruder chewing through filament instead of feeding it correctly. Prints would fail randomly, filament would grind down, and sometimes the printer would just stop pushing material altogether. After a lot of troubleshooting, I upgraded to a dual gear extruder setup which finally solved the issue.
Once the printer was behaving consistently, the real marathon began: printing every individual part of the T-800. This wasn’t one single print. It was dozens of pieces, all requiring cleanup, fitting, and assembly later on. Some prints came out beautifully while others needed to be reprinted entirely. It became a long cycle of print, test, adjust, and repeat.
Sanding, Filler, and Endless Dust
After the printing phase, the project shifted into post-processing, which honestly took just as long as the printing itself.
Every piece started with an initial sanding to knock down the layer lines. After that I used a filler primer to help smooth everything out further. Then it was back to sanding. Then more filler primer. Then more sanding. Over and over until the surface finally started looking like metal instead of melted plastic.
This part of the process tested my patience more than anything else. It’s easy to underestimate how much work it takes to make a 3D print look smooth and realistic, especially for something as recognizable as a Terminator endoskeleton. The finish needed to look clean because every imperfection would stand out once paint was applied.
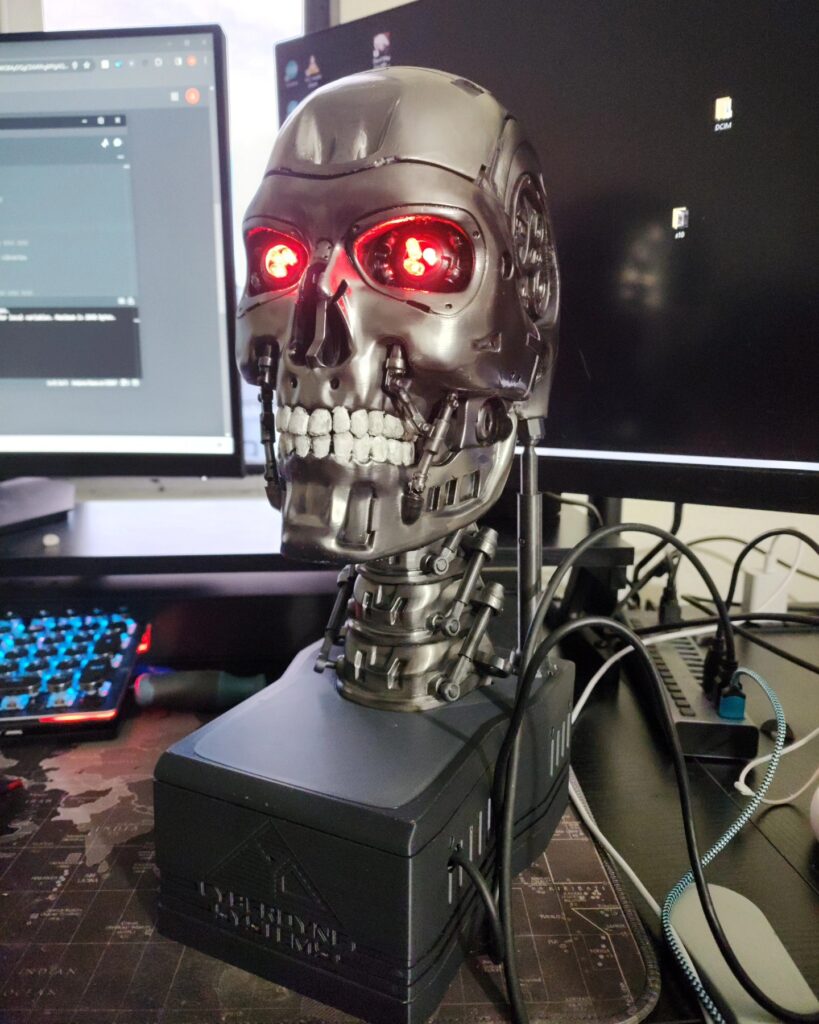
Once I was finally happy with the surface quality, I moved on to painting. I started with a high gloss black spray paint and worked carefully to get a smooth, reflective finish. The glossier the black base, the better the final metallic effect would look later.
After the paint dried and had that almost mirror-like shine, I started applying graphite powder. This was one of the coolest parts of the project because the transformation was immediate. Rubbing graphite into the glossy black surface suddenly made the pieces look like actual metal instead of painted plastic. It gave the T-800 that classic chrome-like metallic appearance straight out of the films.
Watching the plastic parts slowly start looking like a real robotic endoskeleton was one of those moments where the entire project suddenly felt real.
Diving into Electronics
As the physical form of the Terminator started coming together, it was time to tackle electronics.
Now to be clear, I already felt very comfortable with the printing side of the project. The electronics side? Completely different story. Arduinos, servos, wiring diagrams, coding — all of that was basically new territory for me.
Still, I knew going into the project that movement and electronics were part of what would make the T-800 actually feel alive. Static props are cool, but moving robotic components take things to another level.
So I started learning.
That meant a lot of YouTube videos, a lot of trial and error, and a lot of moments staring at wires wondering why nothing was working. But honestly, that learning process became one of my favorite parts of the build. There’s something really satisfying about slowly understanding systems that originally seemed intimidating.
Wiring Everything Together
Once I started integrating electronics into the build, the inside of the T-800 quickly became a maze of wires.
Every servo needed power and communication lines, and all of those wires had to be routed through the internal structure of the model while still allowing pieces to fit together properly. Some sections had already been glued, which meant planning wire routing ahead of time became incredibly important.
There were definitely moments where I realized I should have fed wires through certain sections before assembly, but that’s part of learning projects like this. Sometimes you figure things out after the glue has already dried.
Eventually, all the wiring converged back to the Arduino, which basically became the brain of the entire build. Soldering connections became another new skill I had to pick up during the process. Between soldering wires together, covering connections with electrical tape, and troubleshooting random issues, the electronics side slowly started making more sense.
It wasn’t pretty behind the scenes, but it worked.
Bringing the Terminator to Life
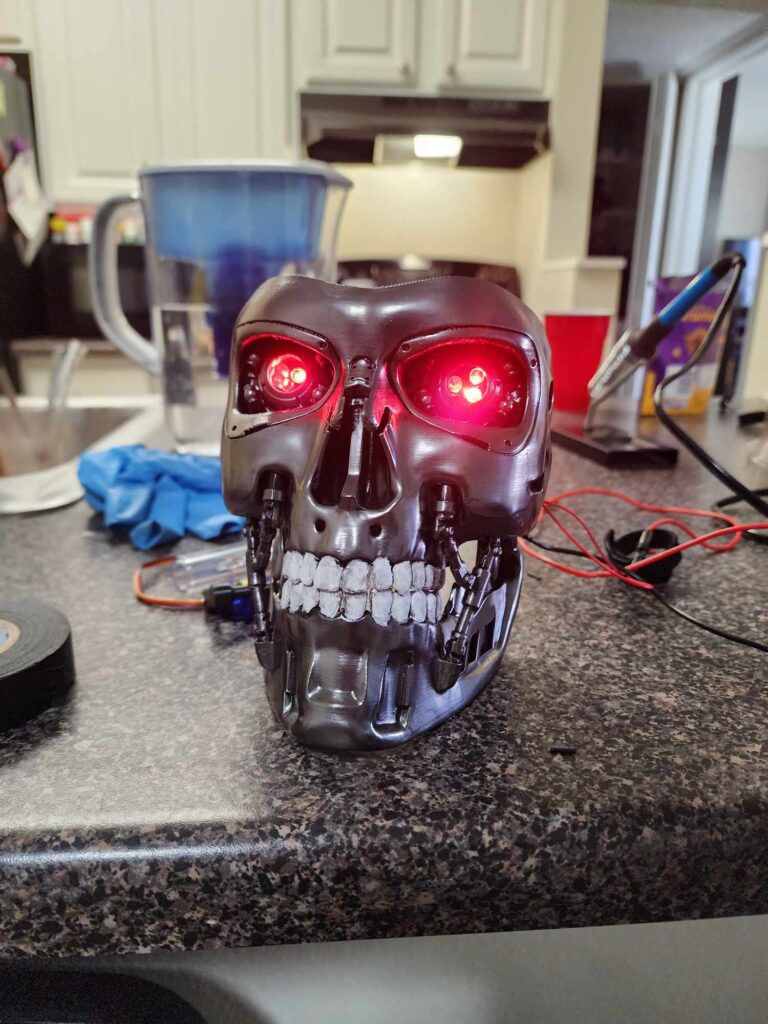
Then came the moment I had been waiting for: getting the servos moving.
And honestly? The first few attempts were disasters.
The movements were wrong, the servos jittered, some wouldn’t respond at all, and more than once I uploaded code only to have absolutely nothing happen. But after a lot of trial and error, things slowly started improving. Eventually I got the servos communicating correctly with the cheap off-brand Arduino I bought from Amazon and finally uploaded working code that brought movement to the T-800.
The first successful movements felt incredible. After all the printing, sanding, painting, wiring, and troubleshooting, seeing the Terminator actually move was surreal.
…until one of the servos broke.
Now instead of moving properly both vertically and horizontally, the T-800 mostly just nods up and down like he forgot how neck movement works. My best guess is that I accidentally got baking soda down into the servo at some point during assembly and it caused internal problems.
So the project continues.
The next step is carefully removing some super glue so I can pull the broken servo out and replace it with one that will hopefully survive a little longer this time around.
Conclusion
Creating this T-800 turned into way more than just another 3D printing project. It became a crash course in problem solving, electronics, painting, coding, and learning how to adapt when things don’t go according to plan.
There were definitely frustrating moments. Failed prints. Bad wiring. Broken servos. Endless sanding dust. But honestly, those problems are part of what makes projects like this rewarding in the end. Every issue forced me to learn something new.
Even now the project still isn’t fully “finished,” and honestly it probably never will be. Projects like this evolve over time. There’s always another improvement to make, another part to redesign, or another issue to fix.
But that’s also what makes it fun.
Seeing a pile of plastic parts slowly turn into a recognizable T-800 Terminator — and then watching it actually move — made every setback worth it.